| 澶辨晥閾炬帴澶勭悊 |
|
SpringBoot浣跨敤Rabbit璇﹁В鍚畬鏁翠唬鐮?PDF 涓嬭澆
杞澆鑷細(xì)http://www.python222.com/article/825
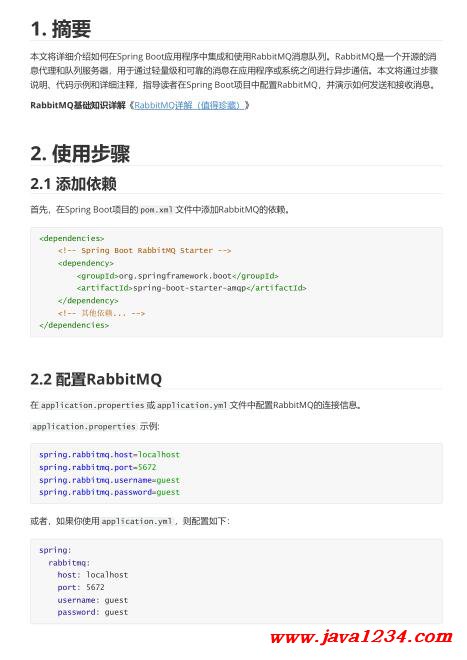
鐩稿叧鎴浘錛?/strong>

涓昏鍐呭錛?/strong>
2. 浣跨敤姝ラ
2.1 娣誨姞渚濊禆 棣栧厛錛屽湪Spring Boot欏圭洰鐨?pom.xml 鏂囦歡涓坊鍔燫abbitMQ鐨勪緷璧栥€?/span>
<dependencies>
2.2 閰嶇疆RabbitMQ 鍦?application.properties 鎴?application.yml 鏂囦歡涓厤緗甊abbitMQ鐨勮繛鎺ヤ俊鎭€?br data-filtered="filtered" /> application.properties 紺轟緥:
spring.rabbitmq.host=localhost
鎴栬€咃紝濡傛灉浣犱嬌鐢?application.yml 錛屽垯閰嶇疆濡備笅錛?/span>
spring:
2.3 鍒涘緩娑堟伅鍙戦€佽€?/strong> 鎺ヤ笅鏉ワ紝鎴戜滑灝嗗垱寤轟竴涓秷鎭彂閫佽€咃紝浣跨敤RabbitTemplate鏉ュ彂閫佹秷鎭€?/span>
import org.springframework.amqp.rabbit.core.RabbitTemplate;
|


 鑻忓叕緗戝畨澶?32061202001004鍙?/p>


